
Viewing and analyzing AUTOSAR models is a recurring task in automotive software development. Very often this is done by just inspecting the XML, which is cumbersome. Some companies have smarter "simple" tools in their portfolio, but they are often included in their commercial offering only.
However, there is a no-cost solution, based on the community-source AUTOSAR tool platform Artop which supports some interesting features.
Since we often find that that projects are not aware of this solution, we will show how to work with the free solution in a short series of blog post. This post shows how to configure the basic installation.
Prerequisites
To be able to access the Artop code-base, you need to have an account at https://www.artop.org/. You can register through the website. Due to AUTOSAR IP regulations, you have to be registering with an e-mail from an official AUTOSAR member company.
Installing Eclipse
Artop provides a so called "Artop-Demonstrator" application, which is supposed to be a simple download for an interactive installation. However, the Artop provided application is a 32bit Java/Eclipse application, and since most companies now have 64bit Java virtual machines installed, the demonstrator cannot be run out-of-the box. So instead we choose to configure our viewer manually. There are ways to automate this, if you want to do this often, but this is not within the scope of this post
I usually start with downloading the "Eclipse For Java and DSL developers" from https://www.eclipse.org/downloads/eclipse-packages/. After unzipping it to any directory, start the Eclipse program (no installation needed!).
Adding Artop
Now log in to artop.org, select "Update Sites" and then choose "Activate" for the Artop 4.7 update site. You are now ready to install Artop in your Eclipse. In Eclipse, choose Help -> Install New Software... and "Add.." the URL https://www.artop.org/containers/artop-sdk-update-site-4.7/ in the dialog shown. You will be presented with a number of of software features to install. Locate and install these features:
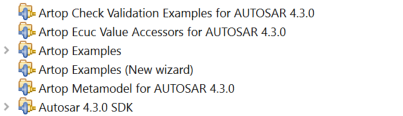
Eclipse will ask to restart after that. We could view AUTOSAR models with this configuration, however, we want some more features from the model management framework "Sphinx" to better navigate models. You can find the update site here. The features to install are:

After a new restart, we are ready to go.
Creating an AUTOSAR project
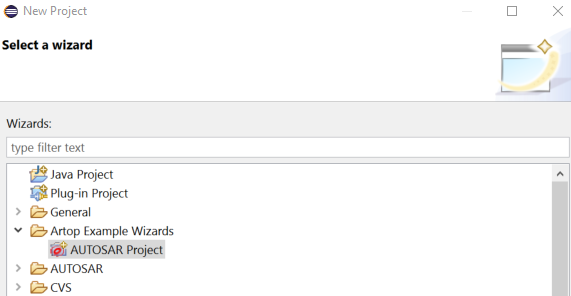
Choose File -> New -> Project... and then AUTOSAR Project in the dialog.
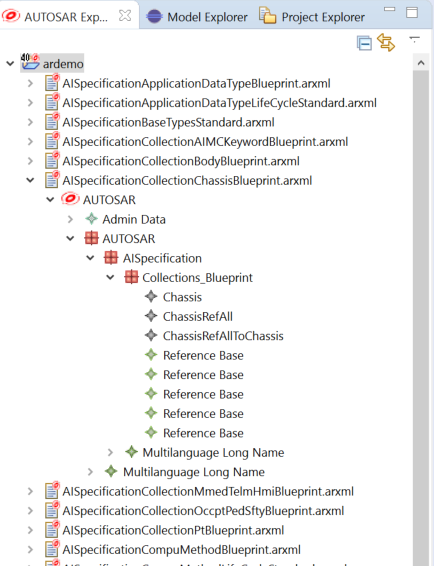
Specify any project name in the dialog. You can easily populate the project by checking "Import Application Interfaces". The project will then be populated with the Blueprints from the AUTOSAR standard. Otherwise leave it empty and drag your own .arxml into the project after creating a project. You should now be able to click through a tree view on the left side of the open application:
Next Steps
The tooling provides more navigation features than just browsing the tree. These will be introduced in the next post. See you there! :)
Comments