In this blog I will show you how you can use state machines in your MSP430 projects easily.
We will start with a simple blink example. For this example, we will use the well known Code Composer Studio (CCS) together with integrated YAKINDU Statechart Tools (SCT). As you will see throughout this blog post, both development environments fit together nicely. The full example with installation and setup instructions can be downloaded at the end.
Why MSP430?
MSP430 is a 16-Bit microcontroller from Texas Instruments that is widely used in industry and designed for low power consumption embedded applications. Texas Instruments provides several LaunchPads for different MCUs for a quick start in developing embedded systems. In our example we use the MSP-EXP430G2 LaunchPad. But any LaunchPad with two LEDs is sufficient to run this simple example.
Why State Machines?
State machines are a well known concept for modeling reactive, event-driven systems. If the application gets more and more complex over time, a good software design is crucial for readability and reusability of source code.
There are several approaches to write state machines manually. In C you usually implement them by using a switch/case or a transition table. Writing state machines manually is a good way to understand the underlying concepts. But once you are familiar with them, you will find yourself writing a bunch of boilerplate code which is a very time consuming, inefficient and error prone task. Automatic code generation is a good choice therefore.
One approach is a code generation tool based on Microsoft Excel offered by TI, an open source solution developed for the MSP430. This is a pragmatic way, but if you use state machines often in your development you will miss some more sophisticated tool features like a graphical editor, model validation and simulation. An alternative to the excel based solution is YAKINDU Statechart Tools.
Why YAKINDU Statechart Tools?
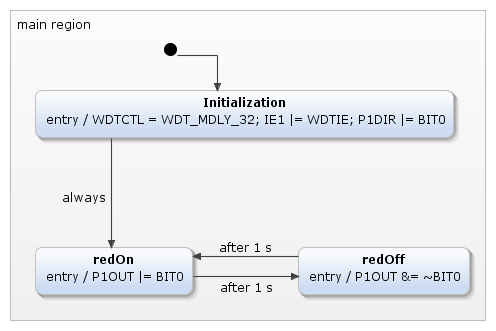
This is how the simple blinky example could be realized with our Professional Edition:


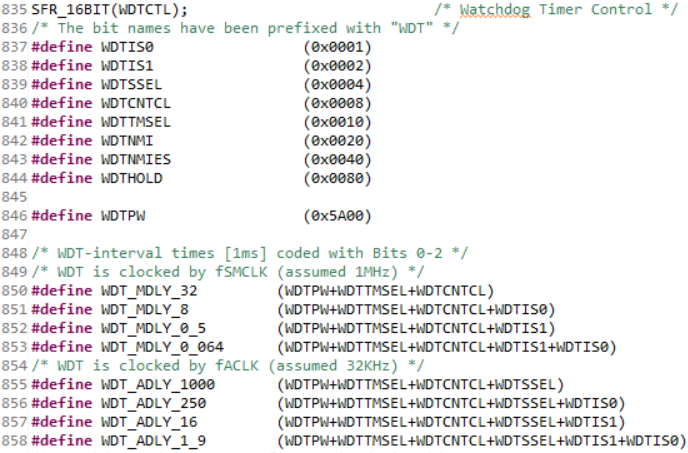
With YAKINDU Statechart Tools Professional Edition you can import existing header files. This has the advantage that you can directly set the predefined values into the available registers. For example, when the state machine enters the State redOn the entry action P1OUT |= BIT0 is executed. By setting BIT0 of the P1OUT register the red LED turns on.
Time dependent events are supported out of the box with a simple implementation of a timing service that is provided with the example. This timing service must only be triggered periodically by any hard- or software timing event, for example the WDT.
Fully Integrated in your Code Composer Studio
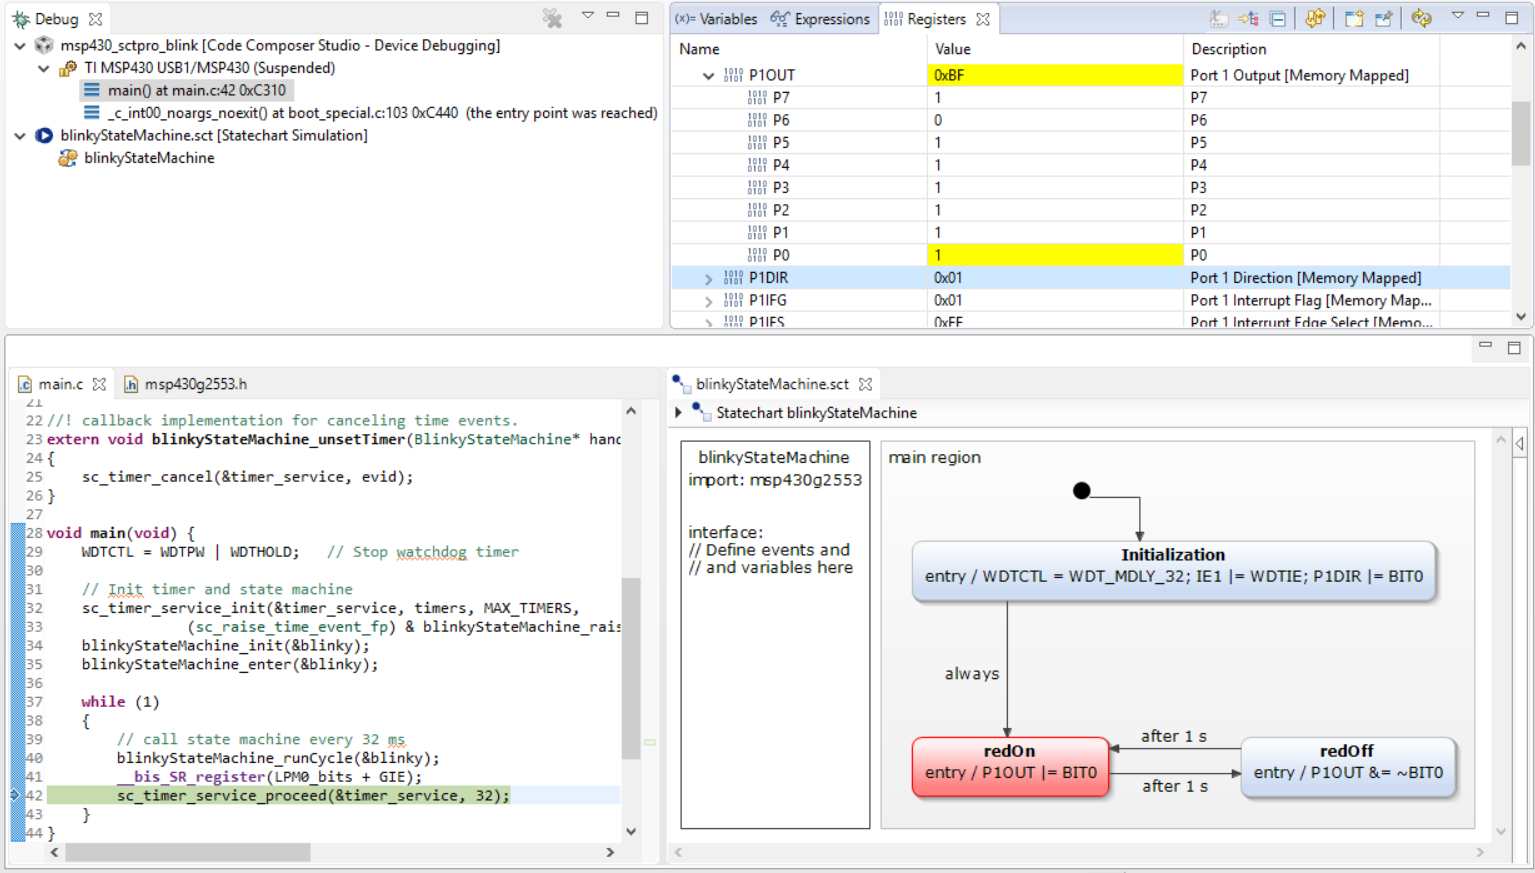
YAKINDU Statechart Tools and Code Composer Studio are both based on Eclipse. Thus, SCT can be installed as a plugin into Code Composer Studio. You can still use all features, which are delivered by CCS - Compiling, uploading and debugging your code.

Adding the YAKINDU Statechart Tools as a plugin provides several advantages. You can create new projects or expand existing projects with a state machine. Go and give it a try!
How to get it?
YAKINDU Statechart Tool as a plugin can easily be installed by “Install New Software” in your Code Composer Studio. For this, you only need to register up on our website and get the download link. A detailed description of how it works will be provided in the example.


Comments