
Well, it's time to set up a useful mail client so that we may make the most use out of our new and shiny keys that we learned to generate in part 4 of this series.
Of course, there exist quite a few clients for all those different platforms out there. Quality often is a matter of personal taste so I'll just focus on the widely known combination of Thunderbird + Enigmail for desktop. Android will be taken care of in a future part of the series. Let's dive in!
This article is part of our series “OpenPGP On The Job”. Would you like to continue with another article from this series? Here’s an overview.
Why not just use a webmailer?
Almost all e-mail providers do offer a mailbox that is manageable via a browser. This feature is called a webmailer. The problem is: browsers do not offer OpenPGP support or an interface to the filesystem of the machine they are running on, which would be necessary in order to use the keyring.
This is the reason why most webmailers do not offer OpenPGP support, which makes them sort of not fit for use as OpenPGP enabled E-Mail client. However, there exists a browser extension called Mailvelope which offers this support. Some webmailers do have a good Mailvelope integration, others don't.
Anyway, during my last test I was not convinced of usability and security of this extension. If you want to give it a try, there is a good tutorial at Posteo.
Thunderbird setup
Since webmailers are not a good choice for use with OpenPGP, we are going to need a standalone e-mail client.
My choice has always been Thunderbird since the separation from the original Mozilla suite. The feature set is ok, it is really mature, available on Linux, Mac and Windows and just serves its purpose.
The popular extension Enigmail brings full-fledged OpenPGP support to Thunderbird. Enigmail uses the gpg installation of the OS and does use its configuration and the keyring. This leaves things flexible, meaning if Enigmail is uninstalled, the gpg setup stays functional.
First things first, we are going to install Thunderbird itself. This really is a piece of cake:
- Download the installer and run it.
- Start Thunderbird and enter your e-mail address. It will guide you through the rest of the process.
I do recommend not to enter your password due to security reasons. Otherwise, it ends up being stored in Thunderbird's password storage where it may be open for attacks. Thunderbird knows virtually all well known e-mail providers and sets up the account based on the e-mail address automatically, even if no password has been entered. In this case, the password will be prompted for on the first mail fetch attempt. When finished, you are already able to send and receive e-mail.
Don't forget to have a look at the settings under Tools → Options and at the account settings under Tools → Account Settings in order to make sure, they are correct and suite your needs.
Restore Thunderbird menu and title bar
I am a bit old-fashioned when it comes to computing and thus I don't like that Thunderbird does not display the menu bar and the title bar per default. Fortunately this can be easily fixed.
With View → Toolbars → Menu Bar you can activate the menu bar. On Windows you can also use the left Alt key to temporarily activate the bar.
As for the title bar you need to directly modify Thunderbird's configuration:
Tools → Options → Advanced → Config Editor- Search for
mail.tabs.drawInTitlebar - Set the value to
false.
Setup Enigmail
Now that Thunderbird has been installed, we need to add OpenPGP functionality to it. This can be done by installing the Enigmail extension. It can be installed directly out of Thunderbird like this:
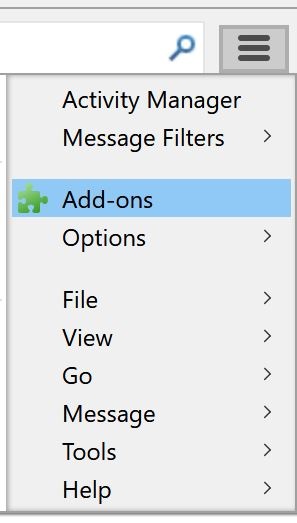
- Click the burger menu in the upper right corner and select
Add-ons.![burger_addon]()
- Now select "Extensions" on the left, enter "Enigmail" into the search bar at the upper right and hit
Enter. The following result is displayed:![enigmail_addon]()
- A click on "Install" finishes the installation.
- Now you should hit the newly appeared "Options" key to have a look at the Enigmail configuration.
![enigmail_prefs_01]()
- The important thing is that the right
gpgclient has been found by Enigmail. If you choose to select "Display Expert Settings and Menus", you could configure one or two more details, most importantly the key servers in use. However, the default settings are just fine.


Activate Enigmail
By default, Enigmail is deactivated for all configured accounts. This is how it can be activated:
- Open the account's settings by doing a right click on the account and selecting settings.
- Select "OpenPGP Security" on the right and activate the "Enable OpenPGP support (Enigmail) for this identity" option.
![account_openpgp_settings]()
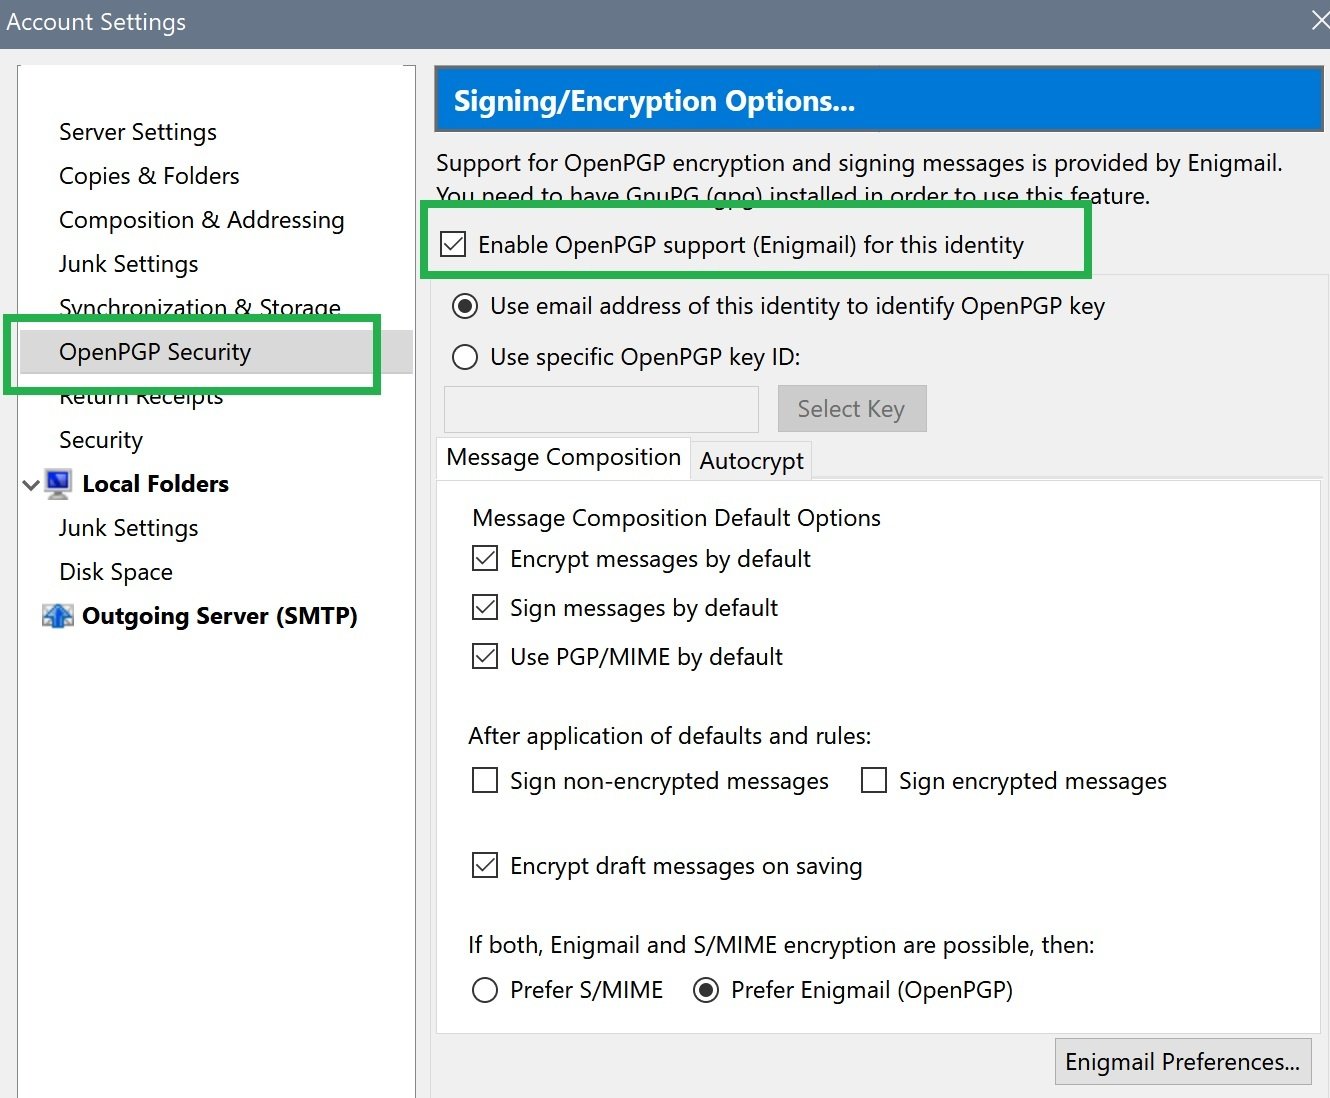
Again, the default settings here are just ok. Pay attention to the key identification. Enigmail does choose the key pair for the selected account either based on the e-mail address or you can also manually select a particular key here.
If you used the account's e-mail address during key generation, you'll be fine. If your key is anonymous or has a different e-mail address attached, you need to select the appropriate key id here.
Update Enigmail
Sometimes it is necessary to force an update, e. g. in order to mitigate a recent security vulnerability like #Efail. Usually Thunderbird does a regular search for updates but in case you need to, this is how you force them:
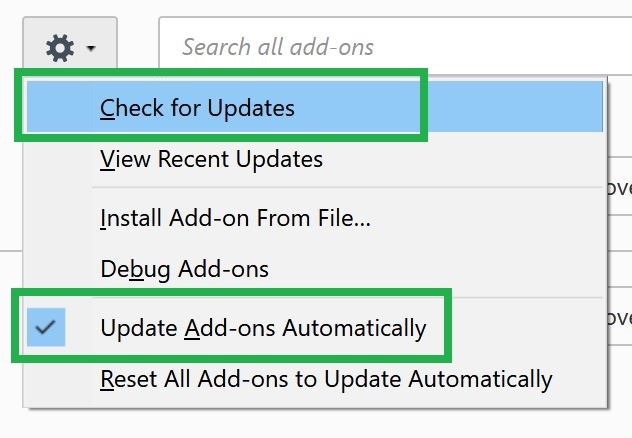
Burger Menu → Add-ons → Extensions- Click the gear on the left of the search bar and select
Check for Updates.![automatic_extension_updates_en]()
- This is also the place where you can (de)activate automatic updates for extensions.
Sending E-Mail
Nothing new here. Just hit that "Write" button and write the mail. The new thing here are the two symbols at the top: A padlock and a pen. They can be toggled on and of.
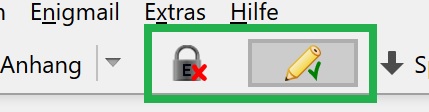
The padlock (de)activates mail encryption and the pen (de)activates mail signatures. I personally do always activate signatures but do activate encryption only on demand. Signature validation is optional to the receiver and they do not interfere with mail readability.
Be aware: unencrypted messages may be manipulated on their way to the sender. However, these manipulations will not stay unnoticed, because the signature will be invalid for the manipulated content. On the other hand this means that the originally signed content cannot be plausibly denied. After all, the signature proves that the original content was signed by the owner of the private key.
Whether to have encryption activated depends on your receivers. As described in Part One, the public key of the receiver is required in order to encrypt the mail. Since not everyone has a key or has always access to her key, you cannot always encrypt.
In addition, people may read their mails through a webmailer or on a mobile device. With both options the private key will most likely not be available, so the mail cannot be decrypted.
Again be aware: selective encryption of important mails may give attackers a hint on which mails they need to concentrate on.
Anyway, if you are done editing and selecting encryption options, just hit the "Send" button as usual. You will be presented with an overview dialog for the chosen keys. If you choose "Send Message", you will be prompted four your key's passphrase (see Part Four). Once you have entered it correctly, the mail will be encrypted, signed and send.
Searching Public Keys
How to find those public keys of the receiver? Well, you could go the old fashioned way and use the command line gpg client (see Part Two). Or you could choose to use Enigmail.
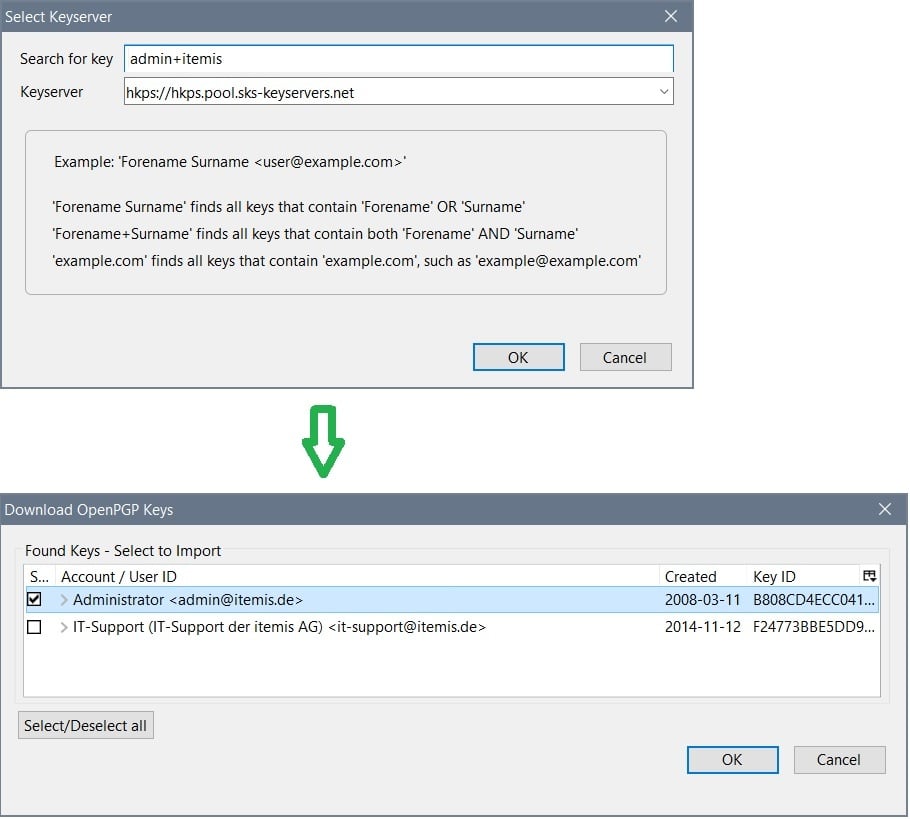
Select Enigmail → Key Management to open a graphical frontend for your key ring. Now select Keyserver → Search for Keys to search for public keys on a keyserver.
Just enter name+family name (for an exact search), select found matching keys and hit the OK button to import them into your local key ring.
Choosing Recipient Key
When sending a mail, Enigmail will most likely show the dialog "Enigmail Key Selection". The reason for this is that although the recipient's key exists in the local key ring, it may not be trusted. Enigmail wants to make sure to encrypt with the correct key. There are multiple options here:
- Use the presented dialog to select the correct key.
- Sign the correct key with your private key which is known as certification. If the master key has previously been removed from the keyring, it must be re-added in order to certify the receiver's key and then it must be removed again due to security reasons. This can be quite a hassle.
- You may add so called "Per Recipient-Rules". This automates the key selection process. See
Enigmail → Edit Per-Recipient Rulesfor details. - The presented options may have a priority order. You can configure priority with
Enigmail → Preferences → Display Expert Settings and Menus → Keyselection
![key_selection_en]()

From a security point of view, there is no alternative to certification. An untrusted key selected by per recipient rules is still insecure, because it could belong to an attacker. If it is clear that the key belongs to the right person and if you have the opportunity, you should sign it.
Sending Your Public Key
In case your public key cannot be obtained from a keyserver but you still want receivers to be able to verify your signatures, you may choose to attach your public key to your mails. This can be automated via Enigmail → Attach My Public Key (accessible from the "Write" window). Be aware that this is a convenience feature. Security is not increased here.
Receiving Mails
When receiving encrypted or signed mails, you must pay attention to two things:
- For encryption you'll need your private key and the accompanying passphrase.
- For signature verification you'll need the sender's public key.
If this key has not been imported yet, Enigmail offers a handy feature for doing so via one of the configured keyservers:

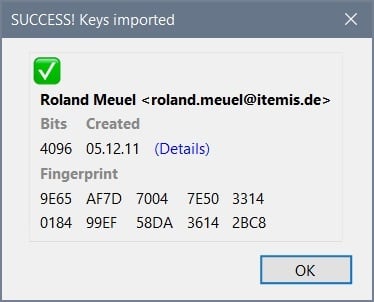
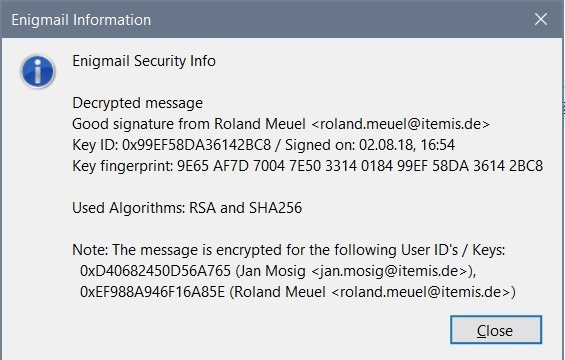
On success the mail gets reloaded and the result of the verification is displayed:

If you choose to click on the lock icon, you'll be presented with detailed information:
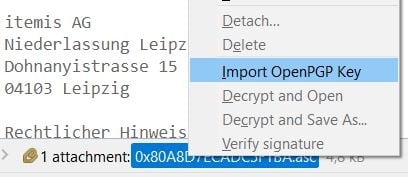
However, the download only works if the keys have previously been uploaded to one of the configured key servers. For some senders this may not be the case. In this situation you must ask the sender to either send you the key or - even better - attach it to the mail:
When importing like this it may be that the signature still does not get verified. In this case you'll need to manually reload the mail via Enigmail → Reload Message.
If The Key Import Freezes
The Windows implementation of gpg (more precisely its component dirmngr) does not seem to be free of bugs. From time to time it may occur that the import of public keys gets stalled. In this case you may succeed by restarting the following agents:
gpgconf --kill dirmngr
gpgconf --kill gpg-agent
gpg-connect-agent reloadagent /bye
Coming Up Next
Well, this gets us a fully functional OpenPGP installation and an e-mail client with full OpenPGP support and reasonable usability. From now on there are no excuses when it comes to sending and receiving encrypted or signed contents.
In the next part of the series, we are going to have a look at Android with K9-Mail and OpenKeychain.
Comments